7
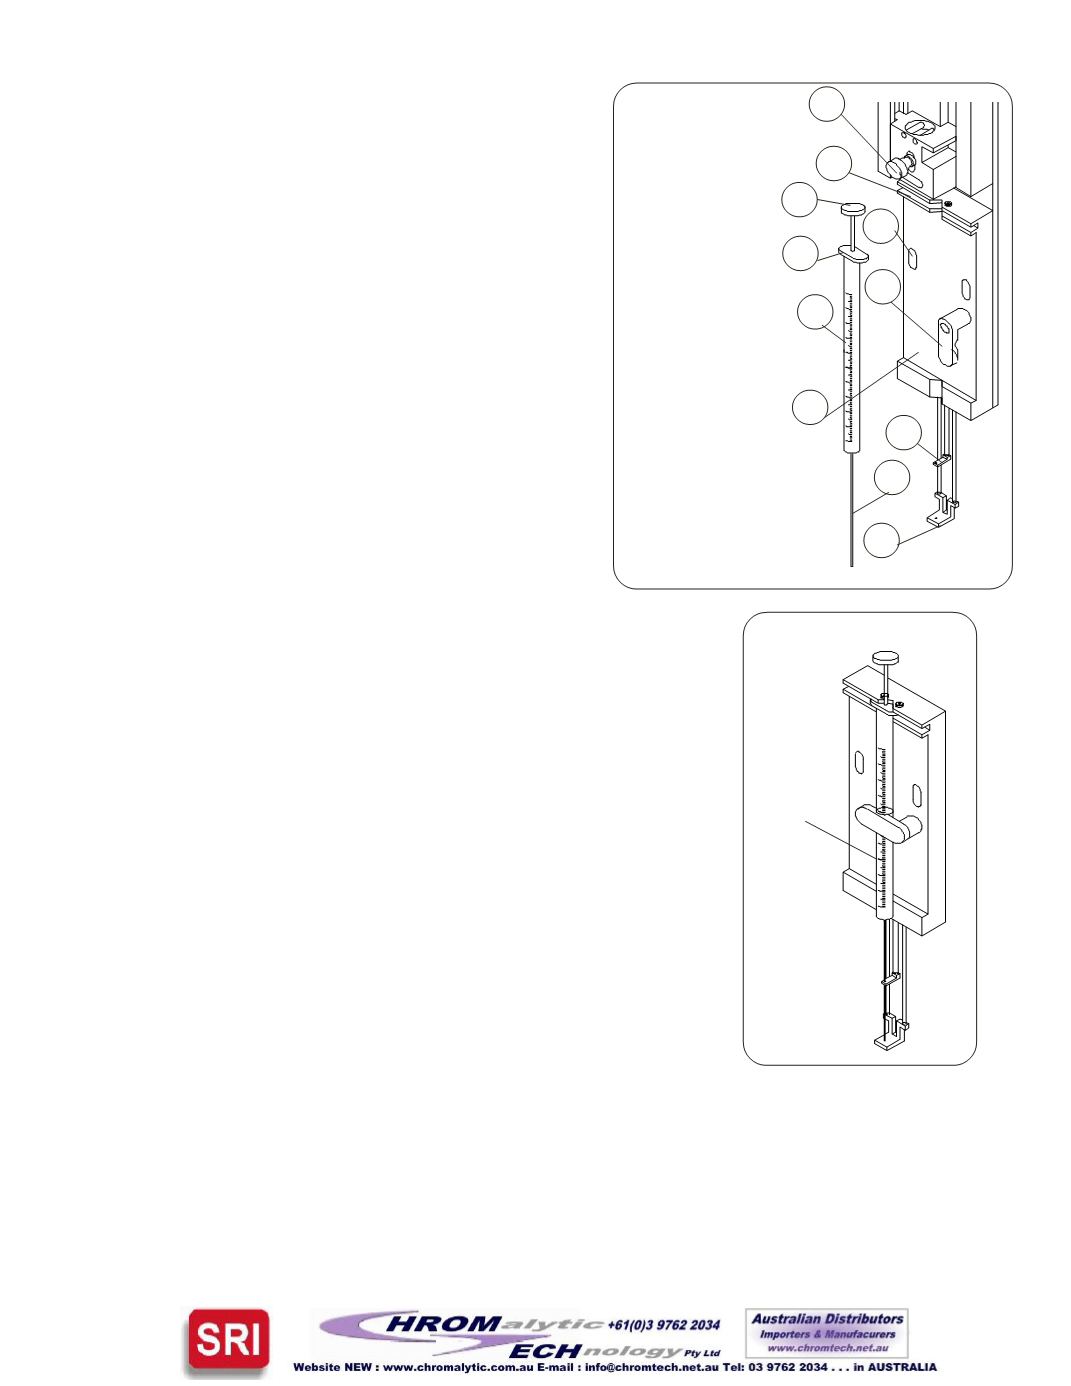
Raise theplunger thumbscrew (1), holding it up,
insert the syringeplunger thumbpiece (3) into theT-
slot in theplunger retainer. Lower theplunger
retainer thumbscrew and tighten securely. Rotate the
syringe clamp (6), 90degrees, tohold the syringe (7)
inplace.
4. Set theplunger to its zeropositionby sliding the
holder (8) upuntil it touches the needle,
thenback it
downabout 1/64"
and tightening the two 4-40
socket head screws (4).
5. Verify that theneedle (10) does not extendbeyond
the lower needleguide (11). Placeyour finger under
the lower needleguide and check. Theneedle tip
shouldnot be felt. If theneedle tip canbe felt, the
needleguide requires adjustment, consult factory.
4.2 SyringeCalibration
The syringeplungermust beproperlycalibrated to insure injection
accuracy. The procedure is performed in the "CobraSetup" sectionof
the control program. Press the "Prog" key and select the “Cobra Setup”
menu, press theEnter keyand select the "Configuration"Menu line,
pressEnter. Now, with the down arrowkey select "Vol Calib", press
Enter. The "SyringeSetup" screen is now showing.
Manuallyadjust theplunger tozero (if required) byadjusting theholder
up, until the syringeplunger touches thebottomof the syringe, then
back it down about 1/64", tighten the two 4-40 socket head screws,
press theEnter key.
Thenext screen adjusts themaximum strokeof theplunger. With the
Left/Right arrowkeys,move the plunger up, such that the endof the
plunger ison themaximumgraduationmarkof the syringe installed.
(Note, record the value showon the line "Volume" for future use). Press
theEnter key. Next, using theLeft/Right arrowkeys, adjust the plunger
stroke to themaximumposition allowedon the syringebarrel. This is
generally about 10% above the syringevolume. Press theEnter key.
NOTE: If the plungermotor "chatters", the syringe holder is set toohighnot allowing the plunger
sensor tobe reached. Loosen the two4-40 socket head screws and slowly lower the holder until the
motor stops chattering. The plunger sensor has nowbeenhomed. Look at the plunger tobe sure it is
at the "0"mark.
Theplunger has nowbeen set to themaximumgraduation (100%)markon the syringe scale. This
will allow the software toproperlycalculate the sampleand rinsevolumeparameters.
2
6
7
8
9
1. Plunger
Thumbscrew in
Plunger Retainer
2. SyringeFlange
Holder
3. SyringeFlange
4. 4-40Socket
Screws
5. SyringeFlange
6. SyringeHolder
Clamp
7. Syringe
8. SyringeHolder
Assembly
9. CenterNeedle
Support
10.Needle
11.LowerNeedle
Holder
10
Figure 4.1
1
4
11
5
3
Figure4.1a
Properly
installed
syringe.


