4 Testing Program
4.1 Start-Up
Insert the plug of the impact device into the socket of impact device on the instrument.
Press the key
,
now power is on. The instrument is in working mode.
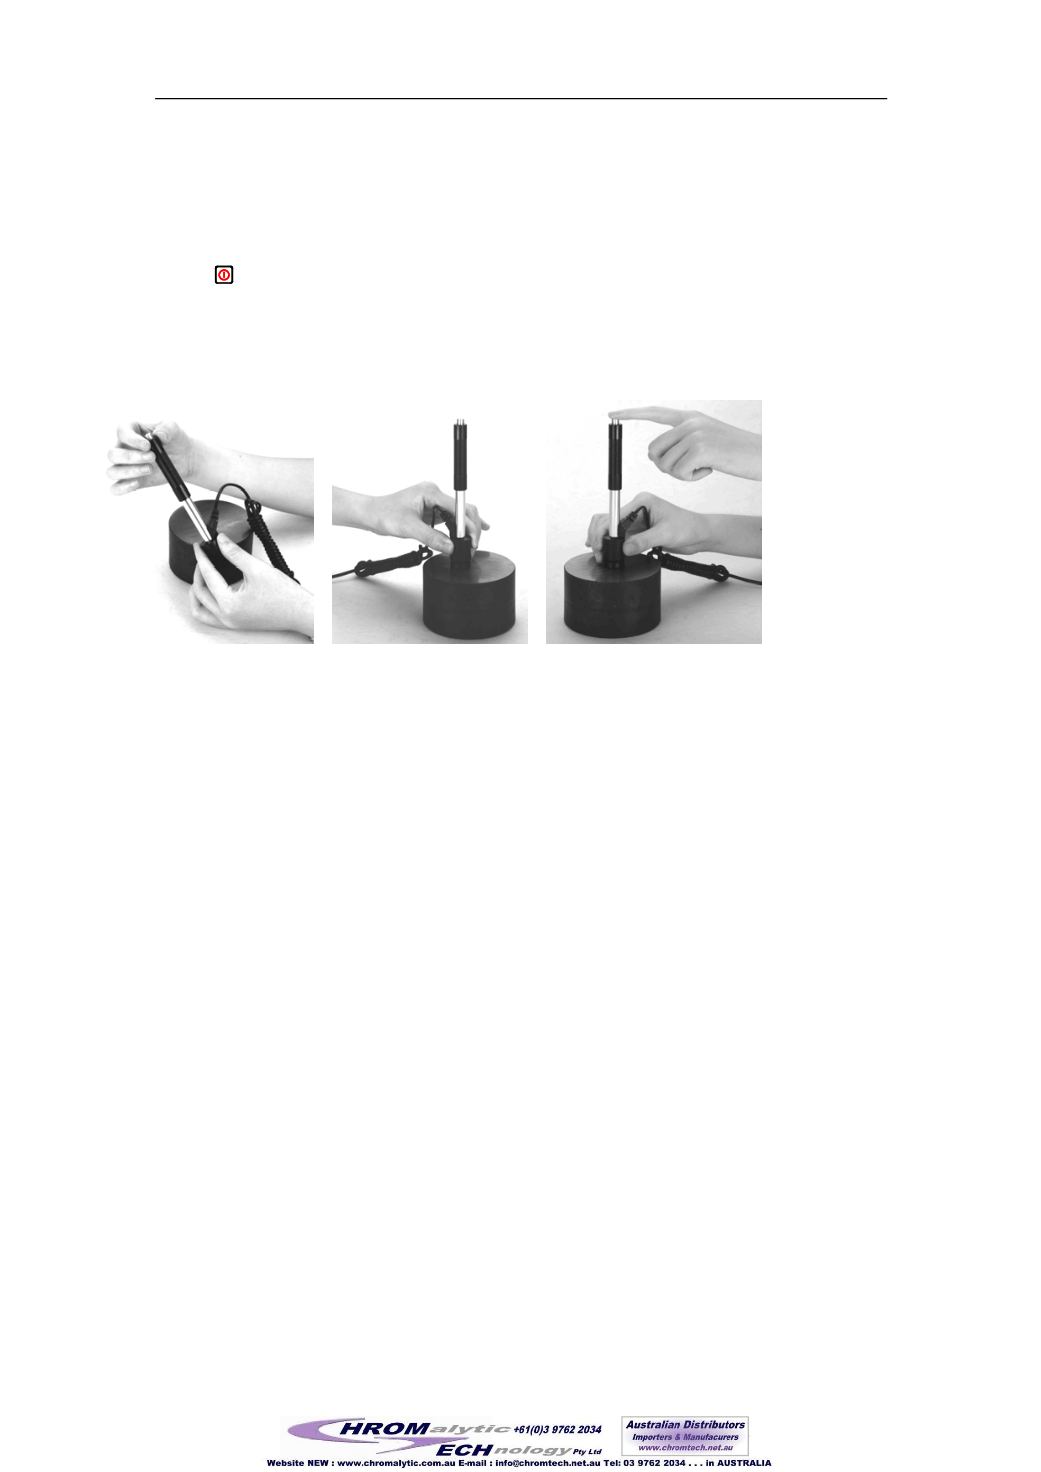
4.2 Loading
Pushing the loading-tube downwards until contact is felt. Then allow it to slowly return to
the starting position or using other method locking the impact body.
4.3 Localization
Press the impact device supporting ring firmly on the surface of the sample, the impact
direction should be vertical to the testing surface.
4.4 Testing
Press the release button on the upside of the impact device to test. The sample and the
impact device as well as the operator are all required to be stable now. The action
direction should pass the axis of the impact device.
Each measure area of the sample usually need 3 to 5 times of testing operation. The
result data dispersion should not more than mean value
±
15HL
。
The distance between any two impact points or from the center of any impact point to
the edge of testing sample should conform to the regulation of Table 4-1.
If want accurate conversion from the Leeb hardness value to other hardness value,
contrastive test is needed to get conversion relations for the special material. Use
inspection qualified Leeb hardness tester and corresponding hardness tester to test at
the same sample respectively. For each hardness value, each measure
homogeneously 5 points of Leeb hardness value in the surrounding of more than three
indentations which need conversion hardness, using Leeb hardness arithmetic average
value and corresponding hardness average value as correlative value respectively,
make individual hardness contrastive curve. Contrastive curve at least should include
three group of correlative data.
Table 4-1
10
200


