DETECTORS
Flame Photometric Detector - FPD
Troubleshooting and Maintenance
Note:
WhenyourFPDdetectorwasassembledat the
factory, the ignitor and jet (and collector electrode, if
present)wereallproperlypositionedwithintheFPDbody.
It isadvisable to familiarizeyourselfwith theirproper
positioning incase theyrequireadjustment. Remove the
1/4”Swagelokcapnut on theFPDexhaust port to see
inside thedetectorbody. Useasmallflashlight tosee the
positionof the jet inside theFPDdetectorbody. The jet’s
tipshouldbeflushwiththecylindricalwalloftheopening
thatyou’relookingthrough,andjustbarelyvisiblefroma
slightangle.Whenlookingstraightdownintotheopening,
youshouldnotbeable toseeanythingprotruding into it.
Toadjustthejet,loosenortightenthe1/4”Swagelokfitting
tomove the jet forwardorbackward. Keep inmind that
if the jetactuallyprotrudes into thePMT’s lineofsight, it
could interferewith theFPD’sperformance. The ignitor
shouldbesimilarlypositionedacrossfromthejet,withthe
tipof itsblade justvisiblebutnotprotruding into theFPD
detectorbodychamber. Toadjustthepositionoftheignitor,
loosenthe1/4”fittingenoughtomovetheignitorforward
orbackwardasnecessary. Tighten the fittingwhen the
ignitor isproperlypositioned. If there isanFIDcollector
electrode installedon theFPDdetectorassembly, itmust
bepositioned in thesamemanner.
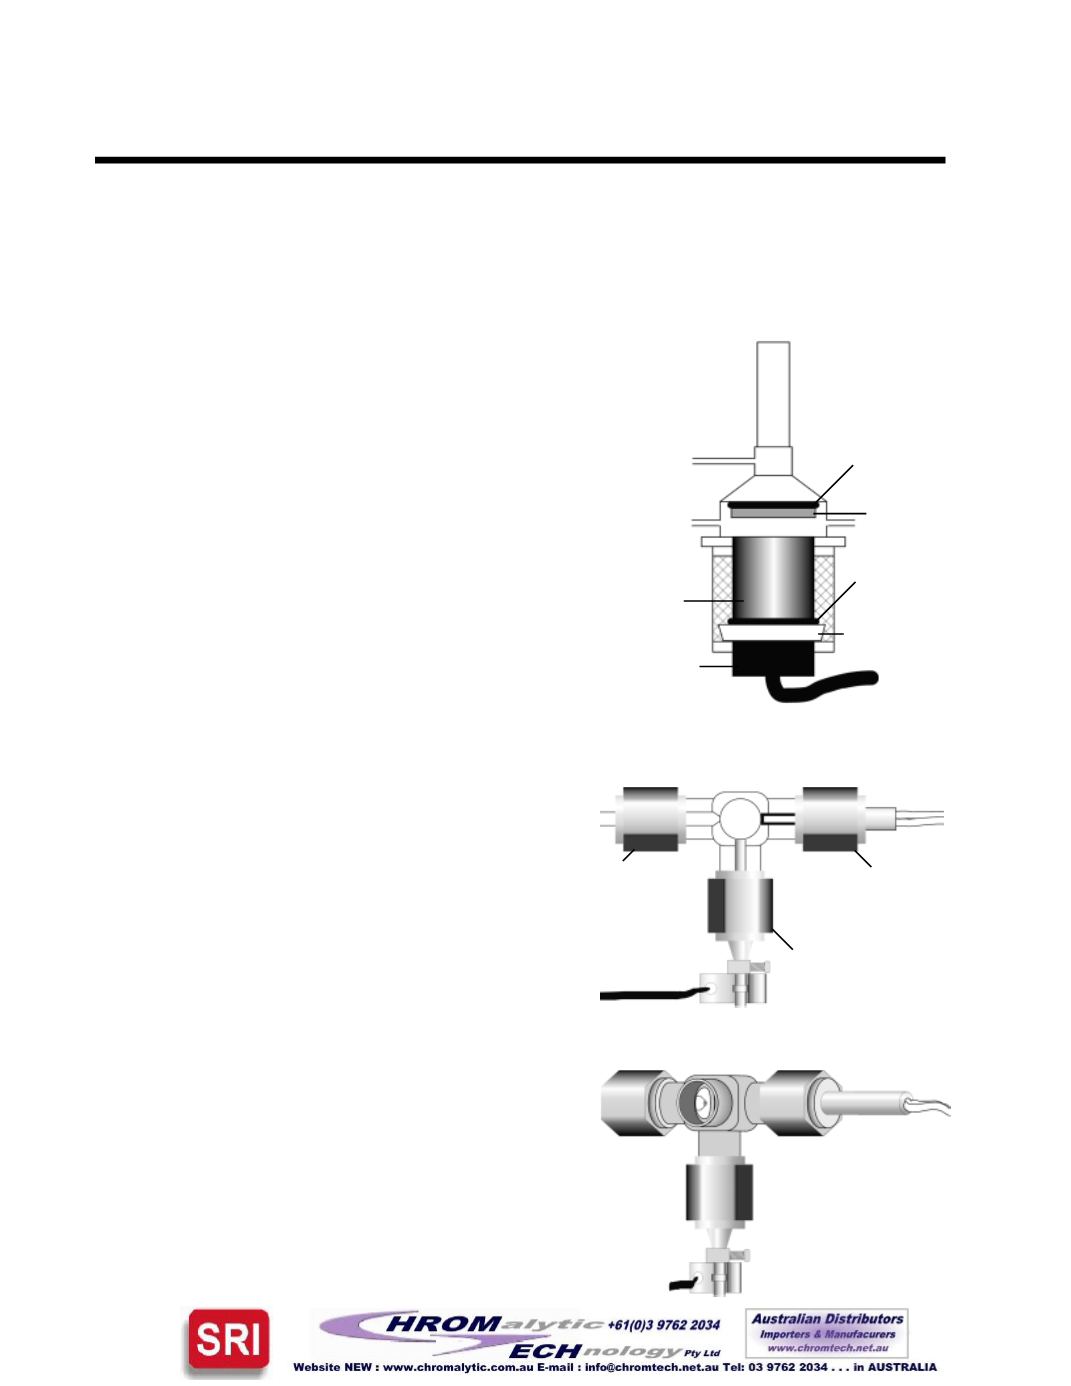
Changing thePhotomultiplier Tube (PMT)
ThePhotomultiplierTube(PMT) isaconsumablepart,andwilleventuallyneedreplacement.
AdditionalPMTsareavailableunderSRIpartnumber8670-0080.
1. Followsteps1-4on the
“
SwitchingBetweenSulfurandPhophorusModes
”
page.
2. Unscrew thestainlesssteelretainingnutandremove it,
withthePMTanditssocket,fromtheFPDassembly. Slide
the retainingnutdown thePMTamplifier lead toaccess
thePMT.
3. Unplug thePMT from its socket. Remove the split
Teflon
TM
ferruleandblacko-ring from thePMT, inspect
themforanydamage,andreplace them ifnecessary.
4. SlidetheTeflon
TM
ferruleandblacko-ringontothenew
PMT. Plug thenewPMT into thesocket.
5. Slide thestainlesssteelretainingnutupandaround the
PMT,andscrew it intoplace.
6. Gently rotate theFPDassemblyback to itsoriginal
angle,andhand tighten the1/4”fitting thatsecures it.
7. Reconnect theBNCcableand thegassupply lines.
Photomultiplier
Tube(PMT)
10-pinsocket
Blacko-ring
Blacko-ring
SplitTeflon
TM
ferrule
Bandpass
filter
PMT Housing
Assembly
Use this1/4” fitting
toadjust the
positionof the jet
Top viewof FPDwith exhaust capnut removed
Ignitor fitting
Collector
fitting
An angled view reveals the tip of the jet


