01
1. Carefully unpack the cleaner and remove all traces of packing materials from
it. Visually inspect the cleaner for any parts that may have become loose or
damaged during transit.
Contents:
a: Main machine
b: Soundproof lid
c: Power cord
d: Outlet filter
e: Mesh basket
f User manual
:
INTRODUCTION
PREPARATION:
2. Place the cleaner on a flat, clean surface where the cooling fans will receive
adequate ventilation and ensure all controls are set to off. Also ensure the
drain tap is in the closed position.
3. Ensure the power cord is securely plugged into the cleaner and that no part
is likely to come into contact with moisture.
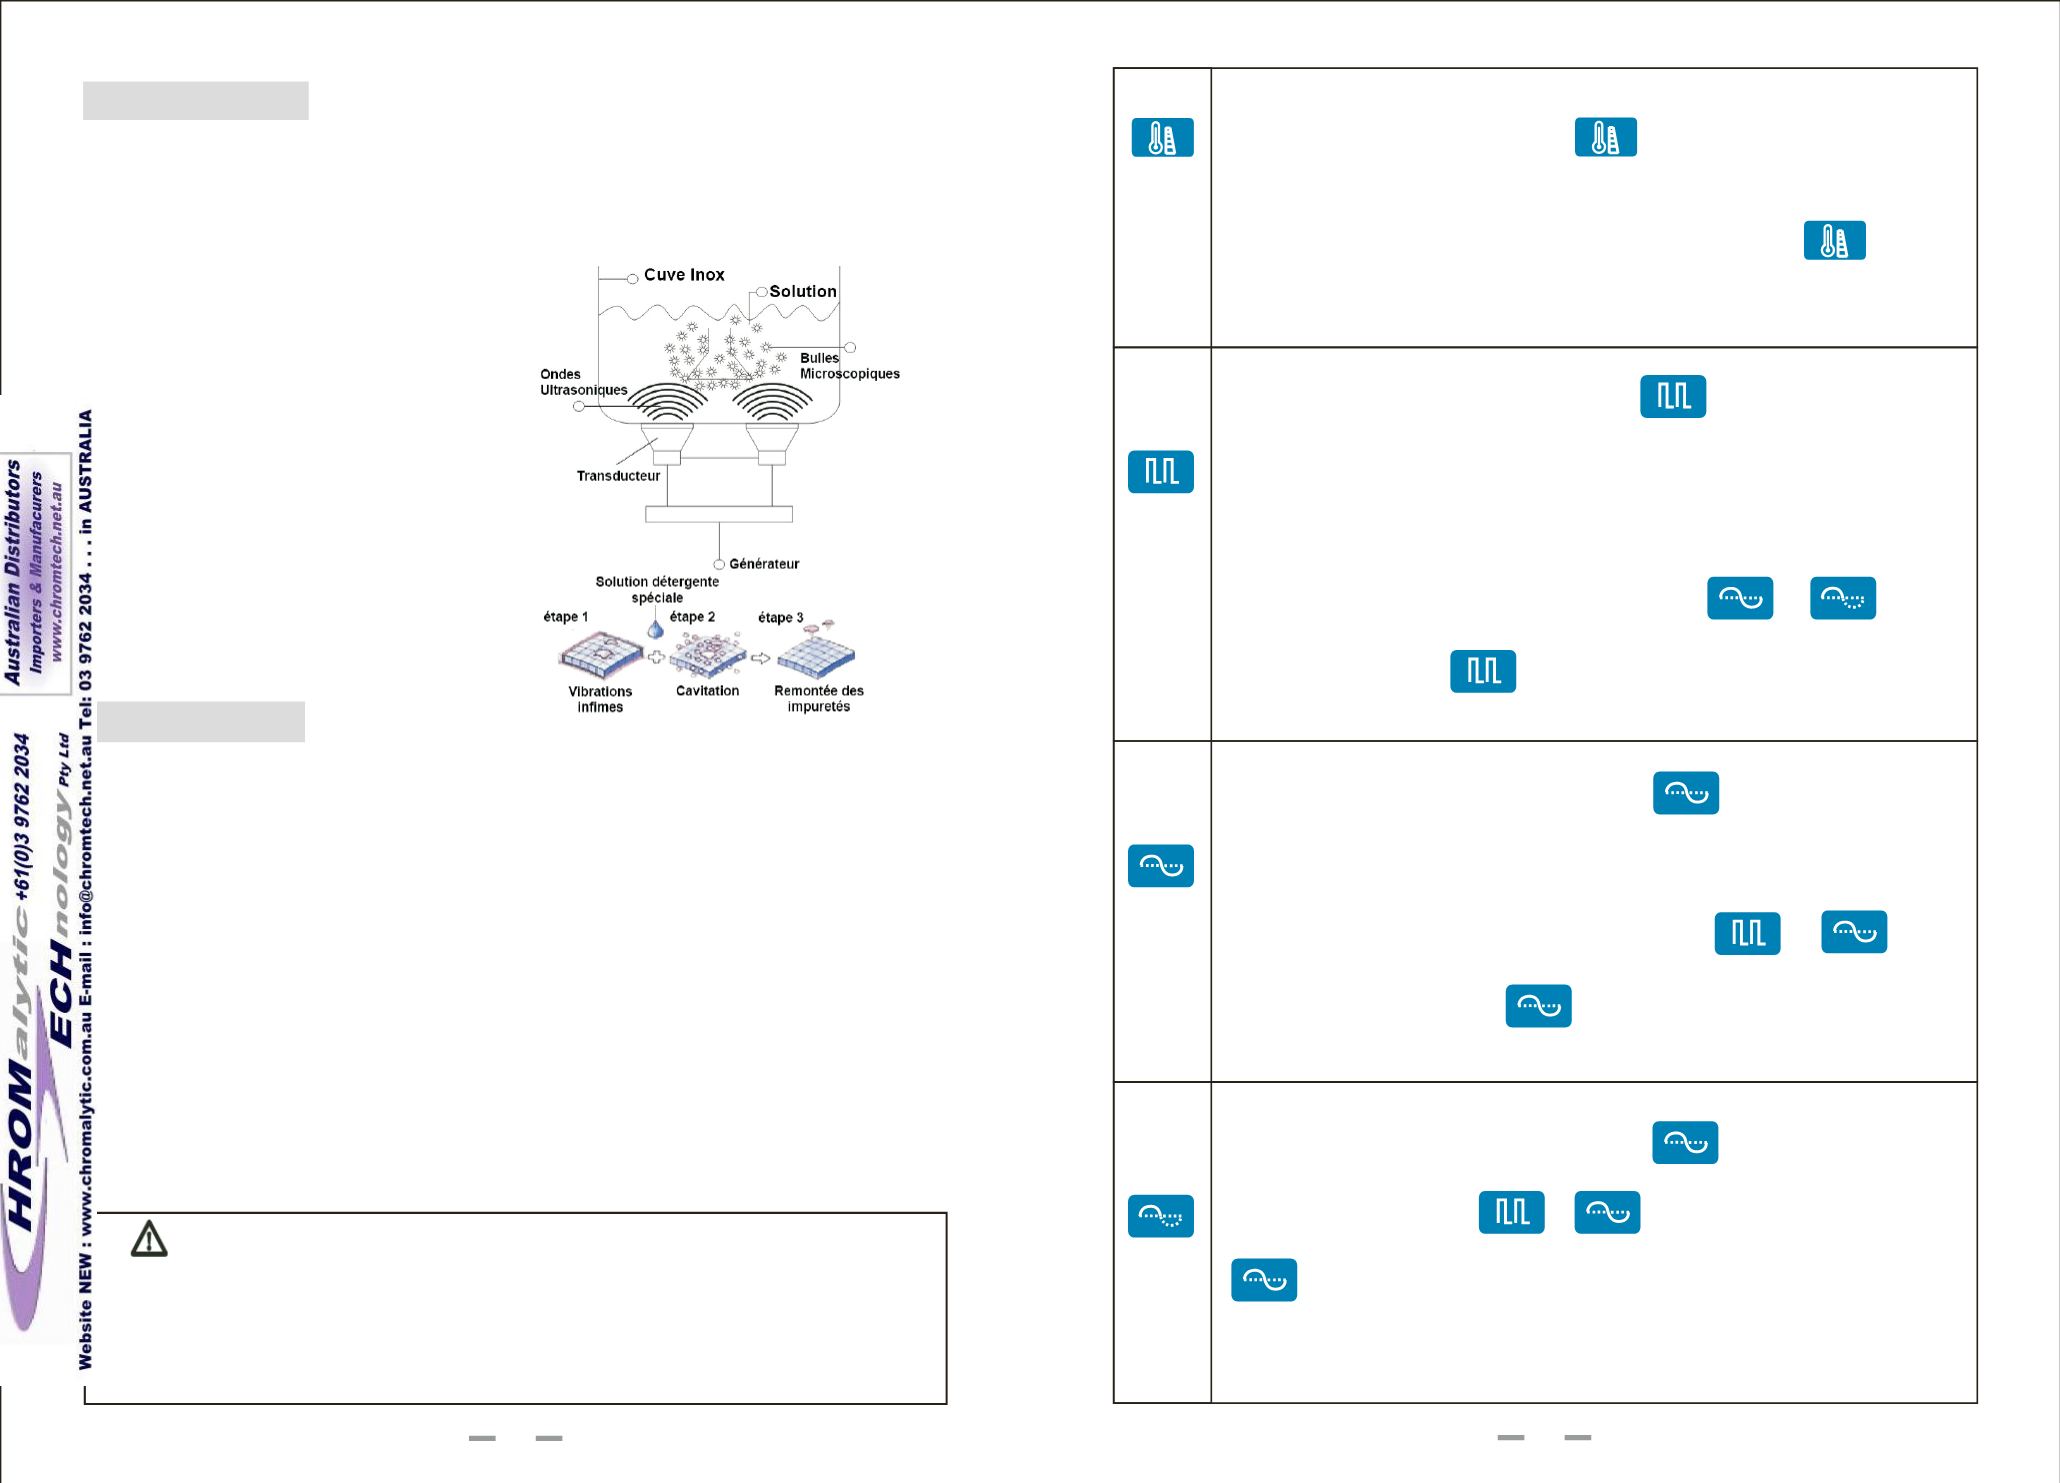
Ultrasonic cleaning is on based on the cavitation effect caused by high frequency
ultrasonic wave vibration signal in the fluid. Microscopic bubbles are formed,
and they implode violently causing the cavitation which create an intense
scrubbing action on the surface of
the item being cleaned. The bubbles
are small enough to penetrate microscopic
crevices, cleaning them thoroughly
and consistently.
Ultrasonic cleaning is extremely
effective at removing dirt and grime
which would normally require tedious
manual cleaning by hand. It has been
used to clean a wide variety of instruments
and mechanical parts such as carburetors,
returning them to almost “like new”
condition without damage to delicate
parts.
06
4. Carefully fill at least ½ of the tank with a solvent solution. For demanding cleaning we
recommend a small amount of washing up liquid, this will help increase the cleaning
performance. The cleaner is now ready for use.
Attention
While the machine is working normally, ultrasonic and tank syntony gives a
well-proportioned sound, and no shudder on the surface of the water, yet
there is spray made by the tiny bubbles. If there are discontinuous surges,
please add or release a little of washing solution in the tank, stopping the
surges is better for the objects cleaning.
2.When setting the temperature, if the setting temperature exceed the
environment temperature, press
key, the heating working, and
indicator on.If below environment temperature ,the heating couldn`t
start, and indicator turn off.
Heating
3.Heating won`t shut off automatically, if you don't
press
.
4.The device with memory function and acquiesce in the temperature you
setting last time.
Normal
Mode
After timer and temperature setting, Press
”Normal” key, the
corresponding indicator on and the device will work in normal
mode: continuously working with full ultrasonic power and countdown
display.
Degas
Mode
After timer and temperature setting, press
, the corresponding
indicator on and the device will work in degas mode : working 6 seconds,
and stop 2 seconds, then working 6 seconds,….cycle like this with countdown
display.
Intermittent operation of ultrasonic power for a quicker degassing of the
cleaning liquid.
If you want to transfer to other mode, just press
or
,then the
“degas” indicator turn off and indicator for “normal” or “soft” turn on; If want
to stop working, press
again, then both heating and ultrasonic will
stop and the corresponding indicator turn off .
If you want to transfer to other mode, just press
or
, the
“normal” indicator turn off and indicator for “degas” or “soft” turn on; if you
want to stop working, press again, then both heating and ultrasonic
will stop and the corresponding indicator turn off.
Soft
Mode
After timer and temperature setting, press
, the corresponding
indicator on and the device will work in soft mode. If you want to transfer
to other mode, just press
or
, the “soft” indicator turn off and
indicator of “degas” or “normal” turn on; if you want to stop working, press
again, then both heating and ultrasonic will stop and the
corresponding indicator turn off.
Note:
Degas, Normal and Soft cannot be operated simultaneously.
27


